Scenery View
Scenery View is RepliMap's 3D view. Use it to review the map as a scene, inspect objects and signals in 3D, and prepare scenes for FBX Export. Most road-network editing is done in 2D view; objects and signals can be added from either view.
New in RepliMap 8.2.2
Scenery View gains a Time of Day panel, a new Background panel, and progress feedback while switching views. See the release notes.
At a Glance
| Feature | Where to find it | What it does |
|---|---|---|
| Switching views | Upper Toolbar ▸ 2D / Scenery dropdown | Switches between 2D editing and the 3D scene. |
| Time of Day | Top of the left panel (Scenery View) | Sets the time of day and cloud cover for the scene. |
| Background | Window ▸ Background | Chooses the 2D map background and the 3D Scenery sky. |
| Camera speed | Preferences ▸ Editor | Sets how fast the 3D camera moves. |
Scenery View screenshot
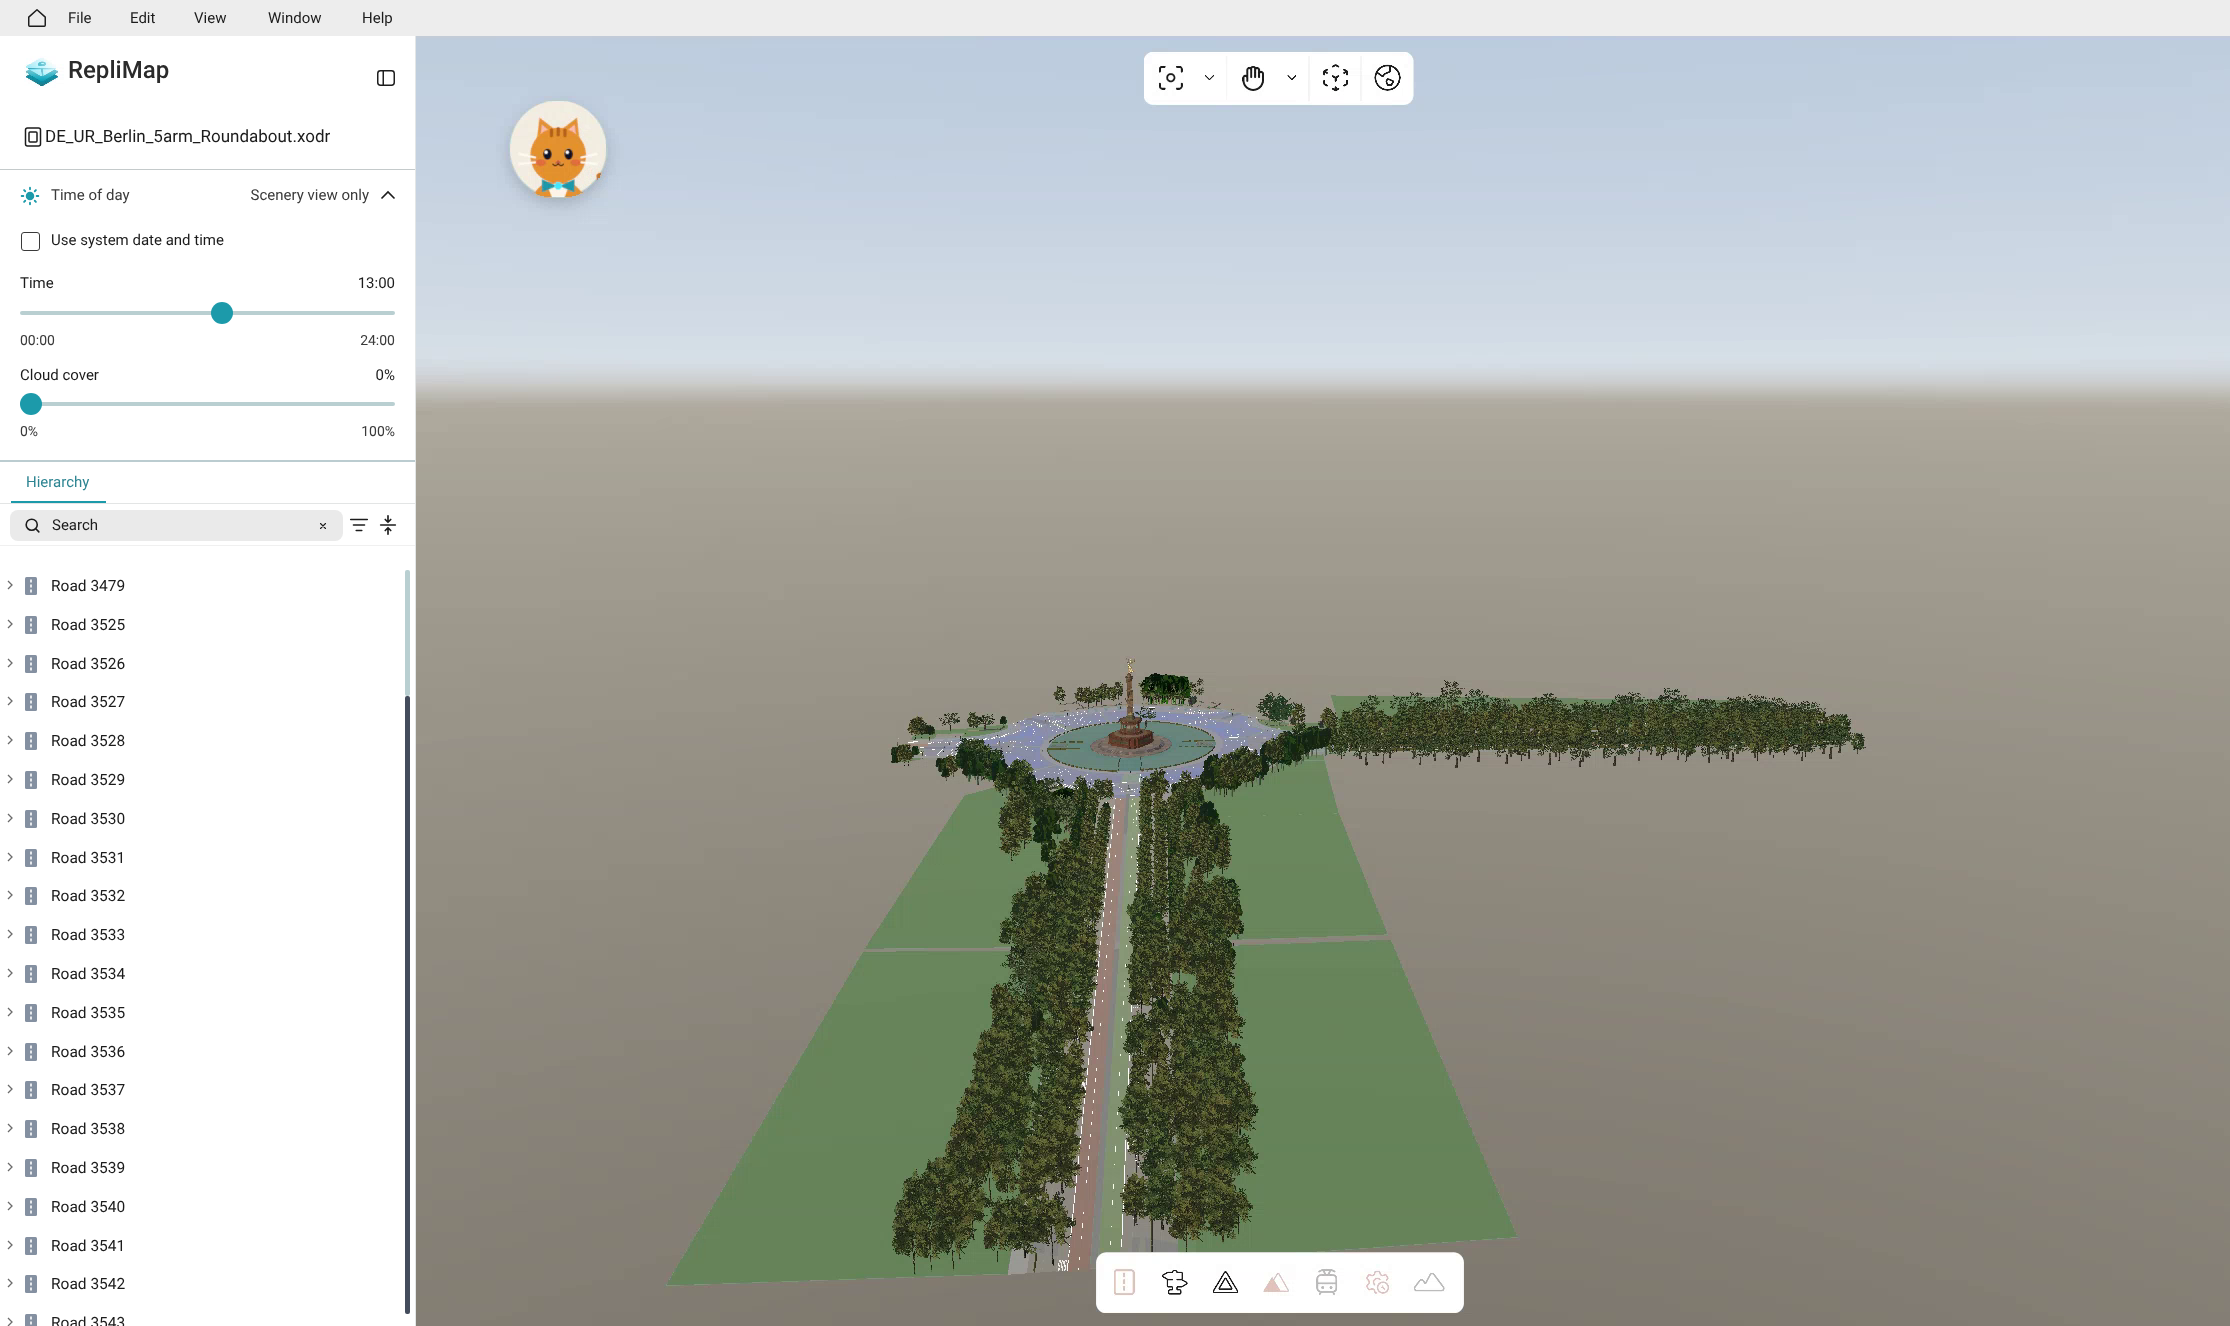
Switching to Scenery View
- Open a map from the Home overview.
- In the Upper Toolbar, open the 2D / Scenery dropdown.
- Select Scenery to switch to the 3D view, or 2D to return to the editing view.
- Wait for the switch to finish. A popup and an hourglass show that the switch is in progress.
Slow switch?
If a switch takes longer than usual (for example, on large maps), the popup shows advice on how to speed it up. Follow the advice shown in the popup.
Move faster in 3D
Hold Shift while navigating to move the camera faster. To change the base speed, set the 3D Scenery Camera Speed multiplier in Preferences.
Time of Day
The Time of Day panel sets the scene background according to the time of day, so you can review the scene under different lighting conditions. Dynamic backgrounds are also available.
Scenery View only
Time of Day is intended for scene review in Scenery View. The settings do not change the map data and have no effect in 2D view.
Open the Time of Day Panel
The Time of Day section appears at the top of the left panel, above the panel tabs, when you are in Scenery View. You can open it in either of these ways:
- Switch to Scenery View.
- In the left panel, click the Time of day header to expand the section.
- Click the header again to collapse it.
- Open Preferences from the user profile menu.
- Under Appearance, find Time of Day.
- Select Open in panel.
Panel Options
Time of Day panel (annotated)
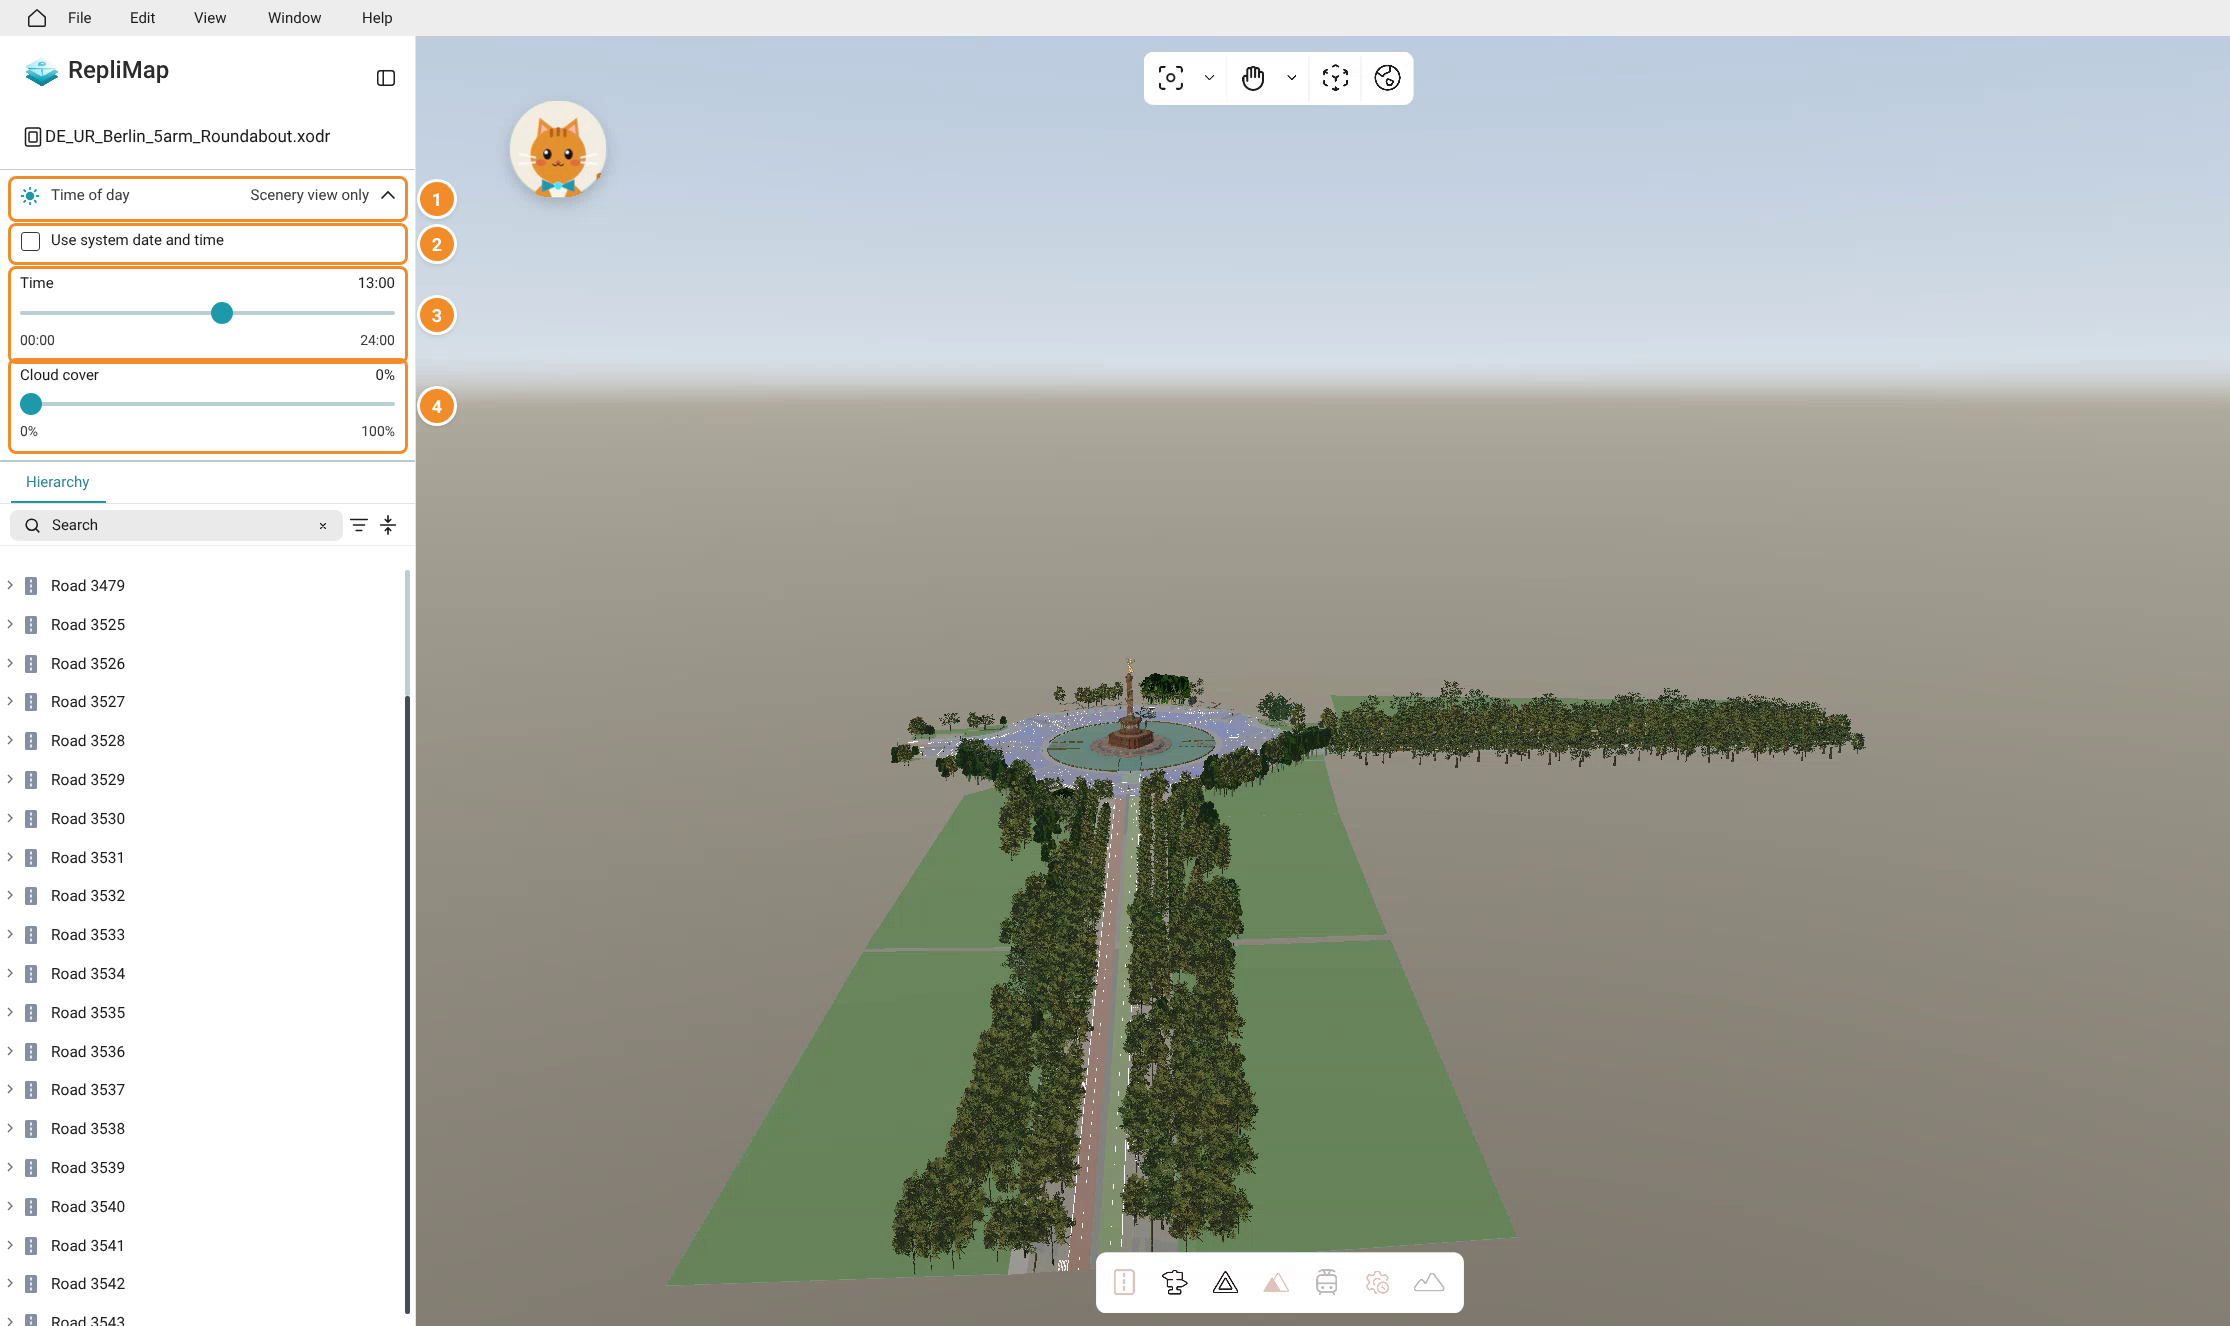
| # | Option | Range | Description |
|---|---|---|---|
| 1 | Time of day header | — | Expands or collapses the section. The label Scenery view only shows that the settings apply to Scenery View. When collapsed, the header shows a summary of the current settings. |
| 2 | Use system date and time | On / Off | Uses the current date and time of your computer for the scene lighting. |
| 3 | Time | 00:00 – 24:00 | Sets the time of day manually. |
| 4 | Cloud cover | 0% – 100% | Sets how cloudy the sky is. |
Set the Time of Day
- Switch to Scenery View and expand the Time of day section.
- Choose how the time is set:
- Select Use system date and time to use your computer's clock, or
- Clear the checkbox and drag the Time slider to the time you want.
- Drag the Cloud cover slider to set how cloudy the sky is.
- Review the scene. The sky and lighting update as you change the settings.
Note
When Use system date and time is selected, the scene follows your computer's clock. Clear the checkbox to set the time with the slider.
Examples
Compare how the same scene looks with different settings:
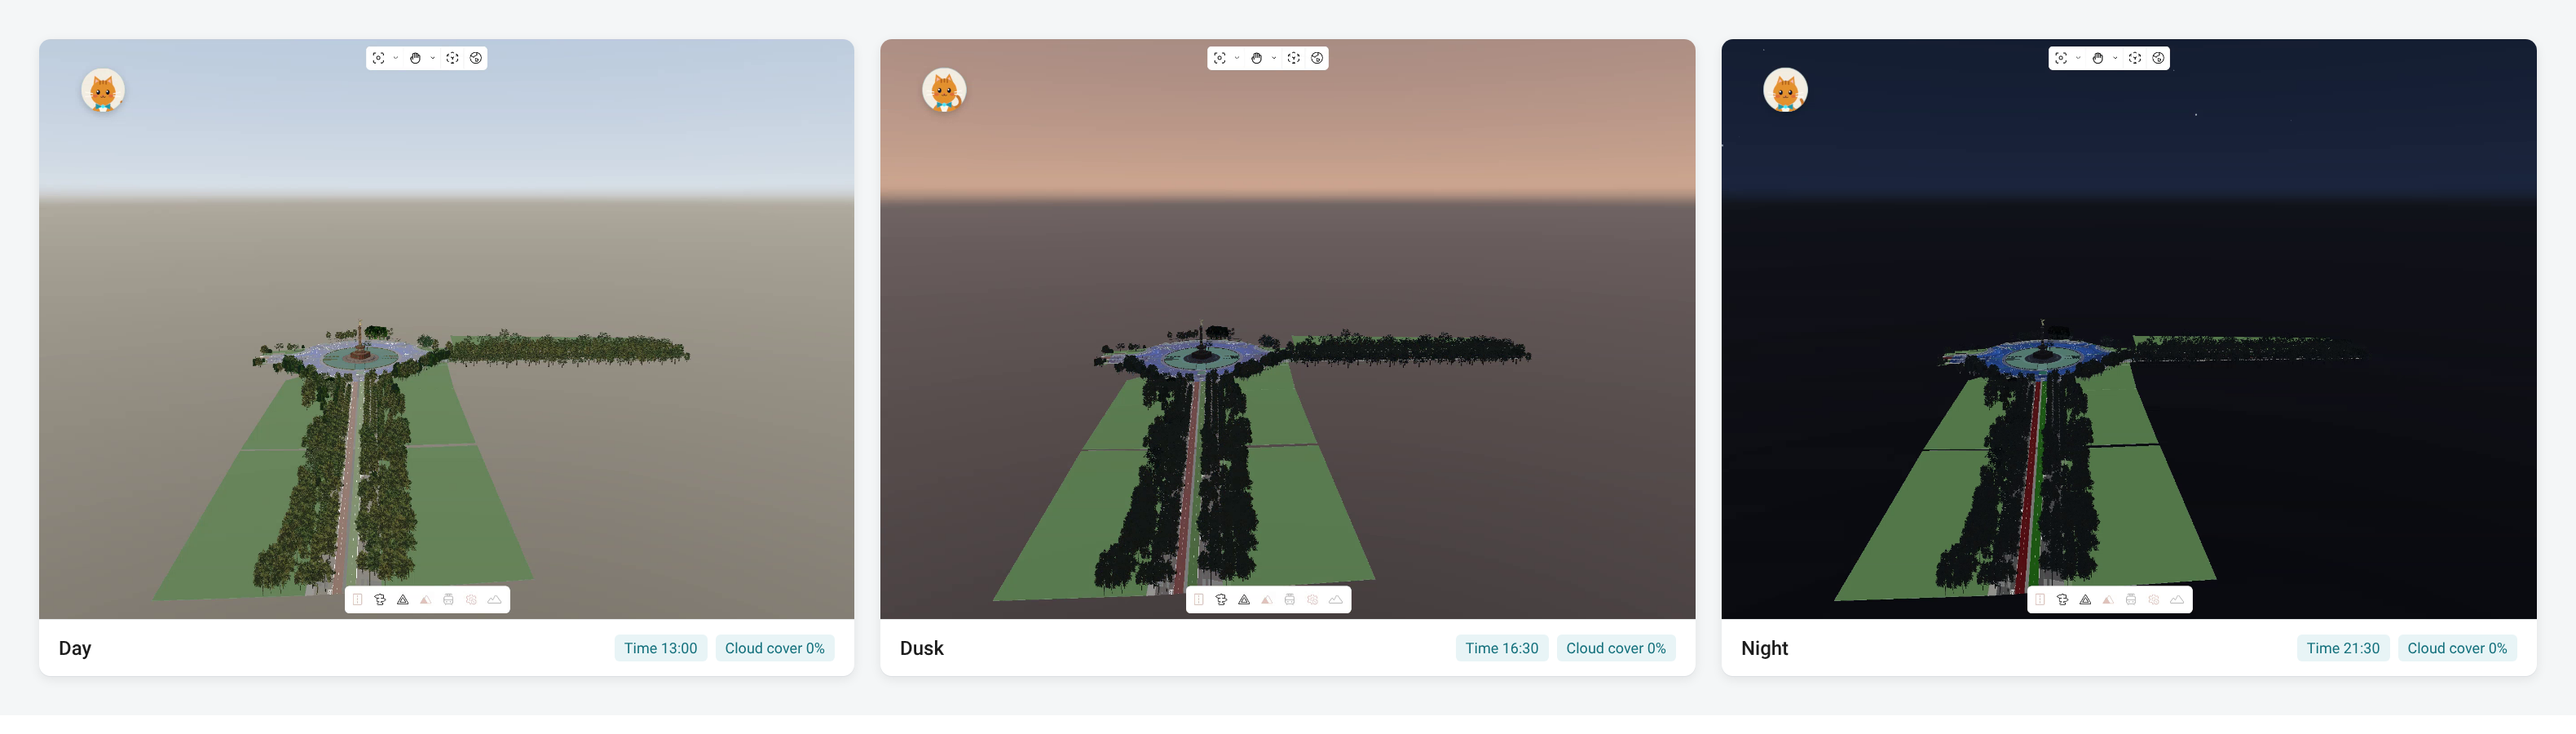
The sky and scene lighting change with the selected Time. All examples use 0% cloud cover.
| Preset | Time | Cloud cover |
|---|---|---|
| Day | 13:00 | 0% |
| Dusk | 16:30 | 0% |
| Night | 21:30 | 0% |
Day, Dusk, and Night comparison
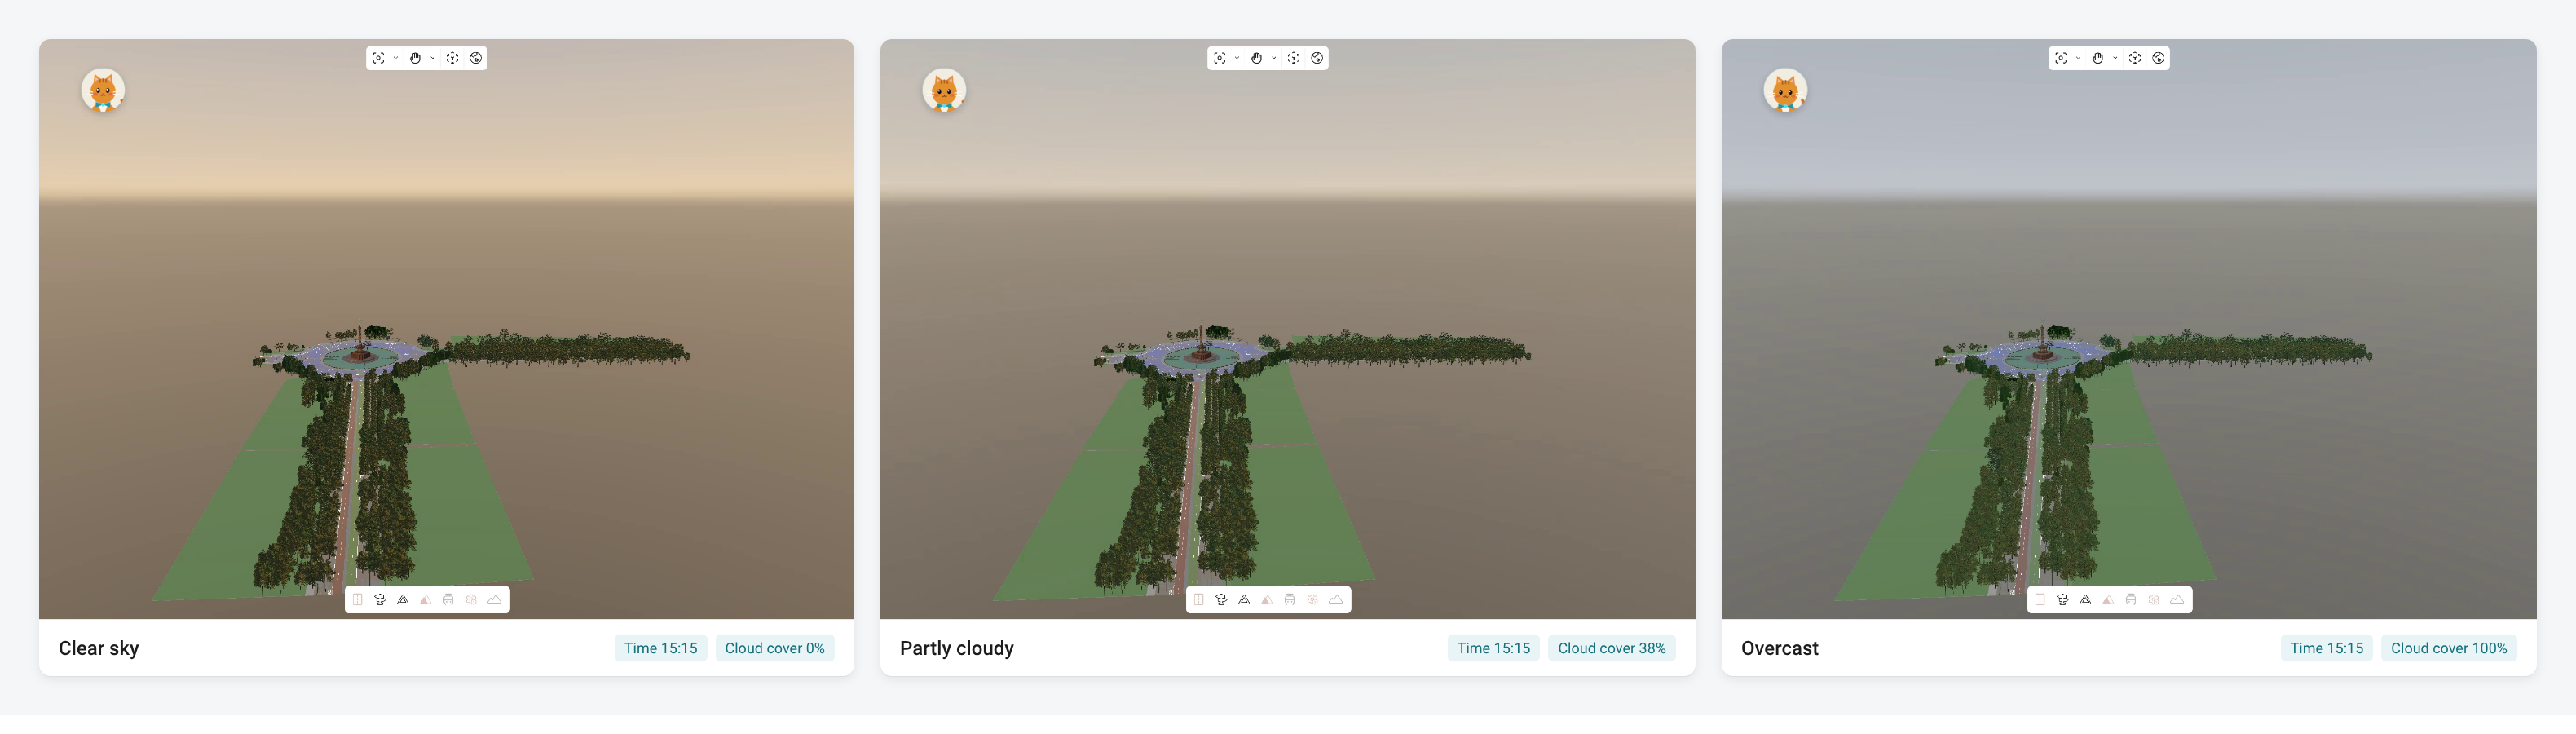
Cloud cover changes how clear or overcast the sky appears. All examples use the same time (15:15).
| Preset | Time | Cloud cover |
|---|---|---|
| Clear sky | 15:15 | 0% |
| Partly cloudy | 15:15 | 38% |
| Overcast | 15:15 | 100% |
Clear sky, Partly cloudy, and Overcast comparison
Background Panel
The Background panel controls what is shown behind the map.
| Setting | Applies to | Description |
|---|---|---|
| 2D map background | 2D view | The background shown behind the map in 2D view. |
| 3D Scenery sky | Scenery View | The sky shown in Scenery View. |
Change the Background
- Open Window ▸ Background from the top menu bar.
- Choose the 2D map background.
- Choose the 3D Scenery sky.
Scenery ground removed
The Scenery ground has been removed. The scene now shows the map on the selected background and sky only.
Solid or dynamic background
You can also choose a solid or dynamic 2D map background in Preferences ▸ Appearance ▸ Theme & Background. See Theme & Background.
Related
- Main screen overview — editor layout, toolbars, and panels.
- Login, Profile & Preferences — appearance, background, and camera speed settings.
- FBX Export — export the 3D scene from Scenery View.
- Release notes — RepliMap 8.2.2.