Stop Line
A Stop Line is a road marking that indicates where vehicles must stop before entering an intersection, pedestrian crossing, or other controlled area.
In the latest ASAM OpenDRIVE standard, Stop Lines are represented as Signals instead of road objects. This enables Stop Lines to use Lane Validity, allowing users to control which lanes the Stop Line applies to.
How to Add Stop Lines
Follow these steps to place a Stop Line:
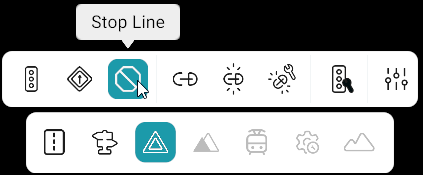
- Select Signals from the bottom toolbar.
- Click Stop Line from the Signals toolbar.
- The Stop Line panel opens on the right side of the canvas.
- In the Stop Line panel, click Create New Stop Line.
- The cursor changes to a + icon, indicating that creation mode is active.
- Click anywhere on the desired road.
- A Stop Line is created across all drivable lanes of the selected road.
- The Signal Properties panel opens automatically for the newly created Stop Line.
Create Stop Line
Note
- Stop Lines can only be created in 2D View.
- By default, a Stop Line is applied to all drivable lanes of the selected road.
Manage Lane Validity
By default, a Stop Line is displayed on all drivable lanes. Use Lane Validity to specify the exact lane range where the Stop Line should appear, including non-drivable lanes if required.
Edit Lane Validity
Follow these steps to edit Lane Validity:
- Select Signals from the bottom toolbar.
- Click the Stop Line tool.
- Select the Stop Line on the map. The Signal Properties panel opens on the right side of the canvas.
- In the Signal Properties panel, locate the Lane Validity section.
- If no Lane Validity exists, click the + icon to create one. If a Lane Validity already exists, select the existing entry to edit it.
- In the Lane Validity panel, specify the From Lane and To Lane values.
- Click Apply. The Stop Line updates immediately according to the specified lane range.
Note
- If the specified lane IDs exceed the available lanes on the selected road, the system automatically adjusts them to the nearest valid lane IDs.
- A Stop Line can only be selected and edited when the Stop Line tool is active.
Stop Line Visualization
The Stop Line visualization is automatically updated whenever the Lane Validity is modified.
Example: Stop Line Visualization
| Field | Value |
|---|---|
| Road Lanes | 1, 2, 3, 4, 5 |
| Lane Validity | From Lane: 1 · To Lane: 3 |
| Stop Line Visualization | The Stop Line is displayed only on Lanes 1, 2, and 3. It is not displayed on Lanes 4 and 5. |
Note
- The Stop Line visualization is updated immediately in both 2D View and Scenery View based on the configured Lane Validity.
Move a Stop Line
After a Stop Line has been created, its position can be modified without recreating it.
Follow these steps to move a Stop Line:
- Select Signals from the bottom toolbar.
- Click the Stop Line tool.
- Select the Stop Line on the map.
- Drag the Stop Line to the desired position along the selected road.
- In Scenery View, use the Gizmo to reposition the Stop Line along the road.
Move Stop Line
Note
- Stop Lines can only be moved along the selected road.
- They cannot be moved beyond the road boundaries.
- Existing Stop Lines can be viewed in both 2D View and Scenery View.
Stop Line Panel
The Stop Line panel displays all Stop Lines available in the current map.
Each Stop Line entry includes the following information:
| Field | Description |
|---|---|
| Stop Line ID | Unique identifier of the Stop Line. |
| Road ID | Road on which the Stop Line is created. |
| Lane Validity | Current lane validity assigned to the Stop Line. |
Stop Line panel
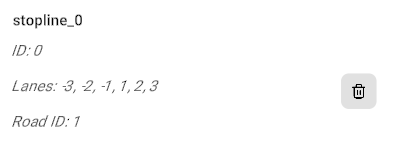
Selecting a Stop Line from the panel automatically selects it on the map and opens its Signal Properties.
Delete a Stop Line
A Stop Line can be removed from the map using any of the following methods.
| Method | Steps |
|---|---|
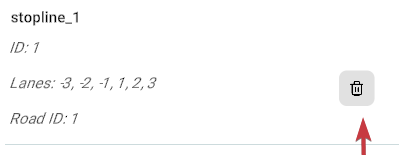
| Stop Line Panel | Click the Delete icon beside the required Stop Line. |
| Delete Button | If a Stop Line is selected, press the Delete button to remove it. |
| Signal Properties | Select the Stop Line and click Delete Signal in the Signal Properties panel. |
Delete Stop Line